I have to start this story a year earlier and with a lot of trouble in private life. My girl friend had just left me and my studies in chemistry didn't go well. I failed an exam in physical chemistry in 2002 which resulted in getting no access to the the related practical training. Consequently, I had to repeat this in the summer term by splitting my 4th semester. The latter was structured already as a releaxed one and now it was need to split this into two semester of nearly doing nothing and end everything with my intermediate diploma. That was a year of a lot of spare time which I had used for a lot of party, sport and training my sculpting skills. That's how I ended my studies in Chemistry and how I started in 2003. While I get better and better in sculpting and worked on my own miniature range my whole project of studying chemistry were in a crisis. I was at the point of thinking about becoming a professional sculpter. I was already running a small business producing metal castings using a spin casting machine sponsered by my Grand Father. But I was sceptical when the second and third figure sales had a slow progress. In parallel two fellow students tried to motivate me to switch to studing food chemistry. In the end I decided for the studies and switched to food chemisty in spring 2003. Because I was missing a practical training I had to spent again a semster nearly doing nothing before this change would work. But ok, this is how a summer should be for a young student and it was the year 2003 and its record summer. It turned out it should become one of the best summers of my life!
Initial thoughts and design notes
Well... that was nearly 20 years ago! How on earth I could remember any detail about this miniature. Side note: At this point I get a slight idea how Aly and the other studio staff is feeling when I start my interrogations about the 4th Edition Dark Elves! BUT, using the tools of digital archaeology I was able to find some written traditions. I was running a website in the early 2000. The website was set offline many years ago but I still have the backup files. Digging deep into the entrails of my computer I was able to find articles which describe the detailed steps creating this thing of beauty.
The written traditions tell the following story. Everything started with a visit of my local retail trader in autumn 2002. There I saw that the Dark Eldar miniature Lilith Hesperax designed by Chris Fitzpatrick was sold for a bargain price. I had to take it and she should be a nice additon to my 6. Edition Dark Elves Witch Elves also designed by Chris Fitzpatrick. Back at home I saw that the Lilith miniature was slightly larger than the Witches. Inspired by my friend Sascha Bukzek aka Goatmans famous High Elven Princess (His miniature won a 3rd place in WH single miniature at the German Golden Demon 2002) I developed the idea to make her an evil counterpart.
Creating the Conversion
 |
Cut of the miniature and rearrangement into a mounted position
|
With this in mind I started to think about how to do the conversion. My
goal was to use as much of the original Lilith miniature as possible
requiring to repose the miniature and resculpt large parts. I cut the
miniature in many pieces which allowed me to create a mounted position.
Using a knife only this took a whole afternoon. The picture on the right nicely shows the single parts. In brief, I started with cuting the hair cleanly from the leg. Then, the legs were cut in a V shape from the body by cuting through the visible parts of the leg. Because the legs were destroyed the remaining parts were cleand from the armour and later resculpted. Both legs were seperated from each other with a further cut. The resulting right leg was bend a bit into position and was finished that way. Her left leg was a bit more complicated as these were originally two parts. Here, the knee armour was not symetrical to her right one which is not a problem with the original miniature because it is not visible, but would become one in my conversion. Therefore, I cut the knee armour off. Same with the foot tip. Both required a later resculpting. Now I had everything I needed to make this miniature a mounted one. But,I quickly realized that it would be easier to rearrange the miniature when I am able to fix it directly on the Cold One. This required at least a saddle. When looking for inspiration in the Warhammer Armybook of the 6th Edition the heavily armoured Cold one from the artworks of Dave Gallagher catched my eye. Especially, the artwork from Malus Darkblade fascinated me. It was a shame that the available miniature reflected the armour only by an alternate armoured head.
 |
Armatures and first armour sculpting of the back armour
|
It was time to change that and show a heavily armoured Cold One. I took the Marlus Darkbalde Cold Ones armour as reference and put small pieces of wire into the back and head of the Cold One as basis for the spikes. Additionally, I used some bended wire to create the horizonal spikes for an impressive head armour. The head itself was cut in to pieces allowing me to open the mouth to a big roar. Immediately, I started to sculpt the back armour using greenstuff. Unfortunately, that did no worked that well and I had a lot of problems. First the greenstuff did not stick on the wire and I was not able to get the spikes in shape especially were the greenstuff hanging over the wire forming the tip. Second, I had big problems to get sharp edges and smooth surfaces on the individual armour plates. Third, the overall look was not as symetrical as it was needed to make this a qualitative conversion. For a competition miniature the sculpting has to be in the same quality as the original miniature. Therefore, I threw the miniature in a coner and worked on something different for the next months.
 |
Reworking through the back armour and spikes
|
From time to time I returned to the miniature and I tried my luck with the chainmail under the saddle. But that part as well looked ugly and far from the quality of the original GW miniatures. However, it allowed me to fix the legs on the Cold One and I sculpted the saddle in a shape of a demonic head. That saddle looked very good and allowed me for the first time to put all parts together. This overall look was really awesome and motivated me to continue. I used a scalpel to rework through the back armour and I finished the sculpting on the spikes. But the final result was still far away from my expectations. Again the miniature ended in a corner of the workbench and was forgotten for a couple of months.
 |
Revised back armour and spikes by using brwonstuff
|
It was already 2003 and a new era of sculpting had started. I was in contact with Chris Fitzpatrick who had left Games Workshop in the meantime. He still did some freelance work for them but worked more on his own comapany
Crocodile Games. He teached me a lot about sculpting and also the use of bownstuff for armour parts because this putty had less surface tension compared to greenstuff and keeps better sharp edges. Because Chris is a very kind guy he also sent me a package of this mysterious putty. The Cold One armour appeared to me as the right test area to get some first experiences with that new putty. Again I reworked through the spikes of the back armour. In parallel I resculpted the armour plates. I needed a couple of tries but finally I was able to receive a good result for the first time. It was a demotivating work and despite the good result I threw the miniature again into one corner of my workbench. I made a break for two weeks and took care for my study exams. My motivation changed after I had finished painting a Sorceress on Cold One with a new colour scheme for her Cold One. Now I had a vision in mind for the finished miniature and I was highly motivated to finish it. Within a couple of day I finsihed the back armour and also reworked through the ugly chainmail. The latter looked great after having found the right tool and the right technique.
 |
Detailed view on the head armour
|
After to many drinks and long evening in a cocktail bar I got the brilliant idea to sculpt the head armour at 1 am. Three hours later I had sculpted all eight side blades and looked proudly on my result. After much to less sleep I continued sculpting the next day with designing the side armour and the armour on the snout. After I had sculpted the details of the mouth I sculpted the chainmail on the head and did the spikes on top. With all this new experience I reworked through the back armour once more. Again it was hard to get into a flow but finally I found the right technique and now everything looked like in one piece.
 |
Finished conversion of the Druchii Princess
|
After the back armour was compelted I sculpted the missing spikes. Now the whole armour was finished. Taken togehter this was leaning the hard way with a lot of try and error but also with a lot of experiences and I was able to learn and to improve.
I continued with doing all the repair work on the Rider. There were also a lot of parts which had to be sculpted completly new like her left foot and knee. Additionally, there was need for some gap filling on the Cold One and Lilith. Now it was time for some additional parts to get a higher degree of detail. I resculpted the small chains between leg armour and her thong. Then I treated the mout an update. By proposal of my good friend Konstantin I sculpted bigger teeth and and a split tongue. For fixing the reins I added some nose rings made from wire and glued these including their chains into the nose holes. I added her missing arm and fixed the lose end of the chains used as reins into her hand. Finally, I added the part of her back spikes and filled the gaps. Here you can see the finished conversion ready for priming and painting.
Painting the Dark Elves Princess
While I was very good in the documentation of my conversion I totally missed to take pictures during the paintng process. Therefore, I have only two work in progress pictures but they nicely demonstrate that the frustration with this miniature goes into a further round.
 |
Sorceress on Cold One painted March 2003
|
In the early 2000 years a new company smashed the Tabletop scene, Rackham withe their Fantasy Tabletop Confrontation. With the new and fresh design of their miniatures a new painting style appeared. This style in a nutshell consisted of saturated basic colours with less contrast in their very smooth blendings and metalic colours painted with normal colours, called non metalic metal (NMM). After some years this painting style gained a foothold also in Games Workshops Tabletop painters scene. When the first demons were already won with this style I was still in my dark Black & White era. But, as I wrote earlier in this article, Change was on its way. With my latest miniature at that time, a Sorceress on Cold One which can be seen on the left my painting style got a bit more colourful with saturated colours. This was also thanks to painters like Sascha Bukzek and others who pushed me with their awesome works into the new trends. Therefore, I decided to jump on the bandwagon and try this NMM style. But first there was need to paint the Cold One.
 |
Finished painting on the Cold One
|
As you can see the colour scheme for the Cold One followed closely the one from the Dark Elves Sorcerss. I painted the greens a bit more saturated into a yellow direction and decided for lighter scales comapred to the Sorceress Cold One. For that the Cold One was primed with
a mixture of Goblin Green and Chaos Black. After that I highlighted with Camo Green and used thinned Chaos Black for shading. The bottom of the Cold One was painted in lighter tones. For that I highlighted first with Rotting Flesh and finally thinned Skull White. After that the basic colour
of the body was finished. For the scales I accentuated
the black primed scales with thinned Rotting Flesh to the bottom. Then I made a second accent with Skull White into the same direction. The warts were primed with Nauseating
Blue, highligthed with Liche Purple and finally with Warlock
Purple. For a wet effect I put a white point on every wart. The mouth except for the tongue was painted in the
same way like the warts. The tongue was painted in blue colours.
Here I used Enchanted Blue as basic colour highlighted with
Lightning Blue and Space Wolfs Grey. Teeth
and horns were highlighted with Bleached Bone and then by
Skull White.
The eyes of the Cold One were primed with Red Gore and
then highlighted with
accents of Blood Red, a mixture of Blood Red and Sunburst
Yellow and at least with pure Sunburst Yellow. Then the
slitted pupil was painted with Chaos Black. At that point the Cold One
was
finished. But I asked myself how I should continue? I did not know and again I put the miniature aside.
 |
First try in painting the back armour in a silver NMM
|
The model got dusty more and
more on my desk. While it continued getting dusty I had painted
some other miniatures and get more and more experience on my NMM path. One day I chatted
with Goatman about the project and I shared some pictures of the miniature. I asked him how he would paint the rest of the miniature. He proposed a very colourful colour scheme with a blue coloured rider with white hair and a Cold One covered in a shining gold armour. Additionally there should be green reflections in the armour of the rider. That all felt complicated and to colourful. There was no way I could imagine that miniature beside my other miniatures in the cabinet. Full of doubts I returned to my known colours and tried a silver armour for the Cold One. But now I saw and recognized what Goatman had said. The armour in gold was needed to get contrast from the scales. It was obvious that this did not work and I painted the whole stuff over, and started
with Goatmans suggestions, with exception of green reflection
in the rider’s armour.
I had started with the Cold Ones armour. First everything was primed with Snakebite Leather which was then highlighted with Golden Yellow and Bleached
Bone. For the red golden
colour of the spikes I used Blood Red which I put carefully on the Snakebite Leather in several thin layers. This had
been the only procedure different from the other golden parts. The
next step had been the Cold Ones saddle which was
designed in a shape of a
demon skull. Therefore, I decided to use bone colours and
painted it in exactly the same way like claws and teeth of
the Cold One. Additionally, the demons horns were painted with the same
purple colours I used
for the warts.
Unfortunately, I have no WIPs showing the different steps. Instead here some side views of the finished miniature as reference
Now it was time to paint the riders skin. There was need for a dark skin tone because armour, hair and clothes were all planed in very light colours. The idea was some kind of Drow style, but with blue highlights instead the usual brown tones which can be frequently seen. Therefore, the black priming was painted again with Chaos Black.
Then highlights were added by using Deadly Nightshade, Enchanted Blue and
Lightning Blue as well as some Space Wolfs Grey for the lights. Finally, I
used very thinned Deadly Nightshade as a glaze to adjust the darkness of the miniatures
skin tone. The result looked very bluish which gave this lady the nike name: Smurfette And I have to admit that I needed some time to get used to it.
Next on my to do list was the Silver NMM. I had to say that my early NMM was of a very light style without much contrast. This was typically at that time and refelcted the style introduced by the Rackham studio artists. Today, I would paint this with much more contrast and consequently a lighter skin tone would be no problem. But the time and my skill set was different. At that time, I used Shadow Grey
as a base colour and added highlights with Codex Grey and Fortress Grey.
The light reflections were placed finally with pure Skull
White. Here I used the same technique which I described already
by the gold colour. Looking today at the miniature I know why Goatman proposed the green reflections. With the greens the whole miniature would look much more harmonic. With the bluish version in the less contrast style the result goes more into a comic direction.
After a lot of grey colours it was time for
something different. I painted the purple elements of the miniature consisting of the drapery on the arm, and the hair-band. I used the same colours
which I already used painting other purple elements. I decided to paint
the boots and the hair in white which was inspired by the rest of my Dark Elves army. For that I primed
everything in Codex Grey and highlighted it in many layers with Skull
White. Now there was only some detail work to do. I painted sword,
chains, and earring in the same NMM colours described ealier. The last thing to do was the eyes, which I
painted very carefully in the holes in the helmet.
Basing
 |
View on the base and showbase
|
At that time point I used Moltofil for creating my bases. To give the surface its pointy structure,
I used a toothpick and poked around in the slightly dried mass.
I placed some skulls on it and fixed the Cold One on the base. After
everything had been dried I put thinned PVA glue on it to make the whole structure more stable. Then the whole base was primed black.
First the skulls were painted in bone colours as discribed earlier. The ground was painted using layers from dark to light in the following sequence: Scorched Brown, Bestial Brown, Snakebite
Leather, Bubonic Brown and Bleached Bone. The stone spikes were painted using the following
colours in this sequence: Codex Grey, Fortress Grey, Skull White (only
edges). Finally, the brown ground was decorated with Staticgras.
For the Showbase I created a frame to hold the miniture base using coffee sticks from a know fast food restaurant. The surface was then created directly on top of the socket and around the frame using the same techniques as used for the miniature base. In additional I used toothpicks and coffee sticks, partly modified with skulls as decorative elements. These wooden elements were dry brushed with several blue colours to link the base to the miniature. For that I used the following colours
in the sequence: Enchanted Blue, Lightning Blue, Space Wolfs Grey.
Pennants
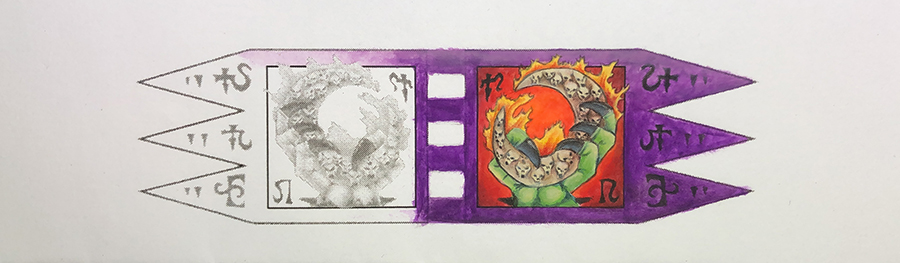
I remember that I was very impressed when having the miniature finished on my workbench. This was so totaly different from everything I had painted before. But I thought there is need to push it further to the limit. For that I wanted to add pennants to the shoulder armour of the Rider which I wanted to use to show some Freehand / Finelining skills. The pennants were created using paper and painted in the same purple tones as used on the miniature itself. I painted a small horizontal colour transition from light purple to dark purple on them and inscribed them with small white runes. I fixed the pennants with small skull seals I made from Greenstuff using a skull stamp. The latter were painted in gold NMM to contrast from the pennants and the silver armour.
Final pictures
The pictures you see below are newly taken ons of this nearly 20 years old miniature. Beside some repair work I had to do two times the miniature is unchanged and still in a very good condition. But see by yourself
The contest and final remarks
While it took months to create my entry for the Golden Demon contest the day istself passed in a rush. I drove to cologne early in the morning by car and met with my fellow student Alex and some of his Nerd-Friends who got there by train. It was my third Games Day and Golden Demon contest so the whole event wasn´t new to me. We tried to get into the vanue early and checked the limited and new stuff which was sold exclusively or some months in advance, respectively. Here I bought a Slaanesh Lord riding a Steed of Slaanesh (which will get his own story in this series). We met some other friends who we knew from the forums and discussed painting techniques and miniatures. Then we checked the studio area and the Gaming Tables. Around noon we left for dinner to a well known fast food resaurant, visited the cathedral and the river Rhine waterfront. We get back in the afternoon to the venue were I checked my competitors and calculated my chances. My miniature was missing in the cabinet, probably for taking pictures. I strolled away and thought that could probably become a good day. A couple of minutes later I was informed that a judge damaged a minature by let it fall on the floor. A couple of minutes later it was clear that it was my miniature.
I visited the cabinets and judges to see what was left of my entry. There I get a lot of excuses by the Judge who was responsible for that accident... ironically it was the Slayer Sword winner from the year before. I feared for the worst! But
beside a ripped chain rein and some spalling paint on the sword the
miniatures had survived its fall very well. Looks like this angry lady
is far beyond toughness 3 which gets her later the titel Druchii
Anointed.
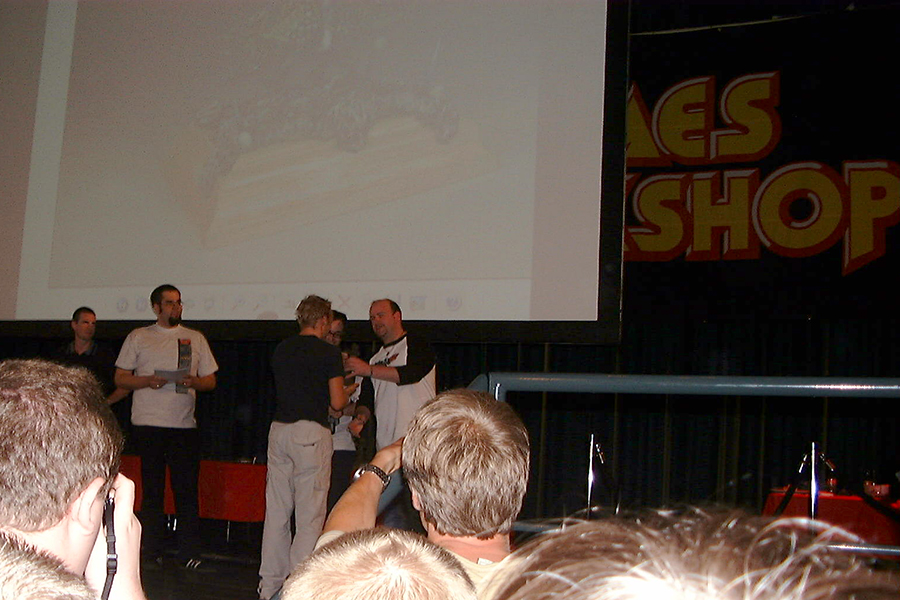
Here you can see my younger Me receiving my first trophy and shortly after between the winners on the stage
After that shock was digested we assembled in the great hall for the award ceremony. As always it was thrilling when they name the winners of the categories you had entires in. I also knew the disappointing feeling when your name was not called. Third place.... other name, second place other name, first place.... Georg Damm! There was it. The moment I had waited for since three years taking part in this competition. I was more than happy and the anger because of my broken miniature was vanished. We celebrated the other winners on the stage before we prepared to leave to celebrate even more in the pubs. It was a hot summer day and there was much to celebrate on this day.
 |
The Nerds of 2003, from left: Alex, Wolfgang, Little Dwarf, Darkness,
Mr I can´t remember and myself sitting in front with my trophy
|
Looking back this was a very exciting time. There was so much change in all areas of my life. There was the beginning of a new direction in my studies, I did a lot of sports and had lost some weight and also a couple of weeks earlier I met my new girl friend at that time. Now there was this big success in painting. I learned a lot during this project and there was much development in my skills at that point. I think the the crucial part was to let go from my routine and hear to the teachings of Sascha. It was his influence who made this project finally successful. His fresh ideas pulled me out of my comfort zone and changed my persepctive. The result was a success and the best I had created so far. But most of it was not from me, it was Saschas creativity which I painted on my miniature. Until today I see the mixture of styles in this angry lady. It was about time to develop my own unique style.
I enjoyed a lot writing this article. It was a travel into the past digging through my old hard drives looking for articles and pictures. Finding all that old stuff and some of my olf memories this article has become highly detailed and much longer than I initially thought. Some days I felt like an archaeologist and I took more time for sorting tons of digital pictures in folders. It was a joy to see all the people who accompanied me on this jouney. Some of them I have still contact to others vanished in the sands of time. Perhaps some of them will read these article. I hope you enjoyed them.
As always I would be happy to read your thoughts in the comments. Stay tuned for further articles of the Golden Demon series.
Kind Regards,
GeOrc