Showing posts with label Shields. Show all posts

Sunday, October 10, 2021

Cold One Knights Odyssey

My Cold One Knight unit led by their General
Cold One Knights

Wow, I started this article in July 2019 to report about my progress on the Cold One Knights I made in March 2019. Since that a lot of things happend. First my work on the Cold One Knights were interrupted by painting the Warhydra for the #MakeaTrish painting Challenge in the Oldhammer FB group in April 2019. Second I realized that I miss a Cold One Knight lance type which turned out to be unreleased. I took the time to sculpt a replica of this lance in May 2019. Third, because I was into sculpting I decided to move on with my work on the unreleased Dark Riders. At this point the Cold One Knights were thus far below in my priority list that I skipped them everytime in favor of doing something else. I returned to my Cold One Knights in December 2020 when starting an initative cleaning my workbench of everything which was work in progress. In the first weeks of January I was able to finish two "work in progress" Knights and to rearrange the Cold One Kinghts Champion on his new Cold One. I quickly moved on with the next two Knights for which I had already finished painting the Cold Ones. This work was interupted again in February when finishing a contemporary "work in progress" Death hag for my Daughters of Khaine. End of February I had finished two more knights, but both still miss some work on the pennants and on their shields. Because my job was very exhausting at that time point I had no energy to finish these difficult tasks. Instead I went for the low hanging fruits and painted the Cold One for the Standard Bearer of the unit in March. When writing these lines we have mid of June and I am still working hard to finish my the second pair of Cold One Knights and the Standard Bearer . This would allow me having a full regiment counting six Cold One Knights. Lets see how far I have come and take a look at the details.  

Rearrangement of the Cold One Knights Champion

The Cold One Knights Champion was one of the first miniatures I had painted within this project. At that point the project was not that structured as today. Therefore, it was built with parts I had at hand. With more and more research in the Cold One Knights I wanted to rebuild the studio regiment. But, this required to switch the Champion to another Cold One. Some of you had probably read the article about the planing and initial steps of building that regiment two years ago. This process was performed so far that the Cold Ones changed the Bases but neithter were the bases finished and painted nor was the Cold One of the Champion finished. Additionally the former Cold One missed a new rider. The starting situation of my Cold one Knights regiment was even more chaotic. 

The Cold One Knight regiment on my Workbench in May 2019

Instead of finishing the started Knights with available Cold Ones I painted a further Cold One in May 2019. At this point I had four mostly finished Cold Ones without riders beside a nearly finished Champion on his new Cold One and two Knights work in progress. On each miniature some detail work was still needed. That was how I left this regiment in May 2019 when the lance problem occured.


The unreleased Cold One Knights Lance

When planing the Cold One Knights regiment I did a lot of research on the Studio army. I realized that there is a second Cold One Knight lance, which looks like it was released but was very hard to find. But until today I was not able to find one, neither on the marketplaces nor in anyones collection. Therefore, I think it was a rather unreleased bit, probably due to some casting problems. Already in spring 2019 I realized that this search could take a bit longer. Therefore, I started to sculpt a replica of it. The scultping wasn´t that difficult with having the reference pictures from the catalogue pages at hand. In the end it need a couple of days to have it finished in end of May 2019. 

Sculptured replica of the unreleased lance in comparison to the released one
 

However, I needed at least two of these to copy its appearance in the studio regiment. Therefore, the casting of it would be necessary. But the casting process makes only sense, when you have enough stuff to fill the mold. It needed a whole year and a couple of further projects and its greens and bits to perform this step. In May 2020 I was ready to do the mold making. The lance was very large and I had problems to fit it into my small mold. It was possible but with a very flat angle. I already feared that the casting will become a problem and I should be right on this. I ran more than two dozen castings of the mold and finally get four complete lances from this session. However, that was enough to fulfill my task.


The return of the Cold One Knights       

Due to a lot of other work in progress miniatures it needed until end of the year 2020 before returning to the Cold One Knights. The end of the year is mostly the time I clean my workbench from unfinished stuff. In this regard I had first finished my work in progress Executioners. Then, I started again the work on the Knights. Two were lying around on my workbench half way painted. I started with the one who would carry one of my replica lances. The Knight and his lance were quickly painted. But, I had a lot of troubles with the lance pennants. First, they did not fit properly, then I cut out their fixations to long and had to fill the gap and then the runes in NMM gold did not work. It was a lot of try and error to make this work. I was more than happy, when this guy was finished January 5th. 

Cold One Knight still with gold rune colour

I moved on to the next Knight to reproduce what I had learned. I started with finishing the base of the formerly Champions Cold One which should become his new mount. The Knight was then quickly painted and also the missing parts of the saddle of the Champions Cold One were also finished so that these two miniatures were finished just five days later. It was the end of the first week in January and I had finished work on these three Cold One Knights now standing in front of me on my workbench.


That was a very good start into the new year and into the third year of my 4th Edition Dark Elves army project. Quickly, I moved on with painting the next two knight where I had already the Cold Ones for.


View on my Workbench at January 14th, 2021

But, in contrast to their colleagues their finish took some endless time. I had several breaks on them because I finished / painted other stuff and also private life and my job drained most of my energy. I was able to get one knight on his saddle until mid of march and also the the pennant was already prepared and fixed. But again a difficult time in my private life appeared on the horizon.


The Knights at March 22nd, 2021

During this time it was very hard to motivate myself painting the penannts and shields. Therefore, I continued the work on the other Knight. Motivation and the energy was low and in the rare cases I sat down on the workbench I looked for painting something simple. At that point the Cold One of the Standard Bearer sneaked into my view and took its chance. During this time I painted the Cold One or the remaining knight always in depandance how much energy was left. With the beginning of April I finished the Cold One first and in less distance the knight and put him on his saddle.

Painting the Standard Bearers Cold One and the remaining Knight in the beginning of April 2021

The smiling thirds

While the two unfinished knights still fight for my attention, the Standard Bearers and the next knight which is already part of the reinforcement get on my workbench. After some first painting sessions on both I quickly focused on the Standard Bearer. 

Continue painting the Standard Bearer and more Knights

I had a good start on him but here as well I quickly loose my motivation when life became that hard that I did not paint miniatures for weeks. When I returned to my workbench again I was a bit out of practice and decided to do something completly different. I finished a Realm of Chaos Slaanesh Champion which laid on my pile of shame since 2009 and a couple of Daemonettes for some excercise. One evening I grabbed for the Standard Bearer instead for the next Slaanesh Follower. I had a lot of fun painting all the NMM golds on this evening and I was again on fire. 

Painting the Standard Bearer in end of July 2021

With this experience I went to vacation on the Baltic Sea with my family. We had a very good and relaxing time there. With new energy I returned home and I could not wait to start painting again and to finish the Standard Bearer. Meanwhile it was already mid of July. It took me a couple of painting sessions, before I was able to put him on his Cold One in end of July. 

The finished Standard Bearer between his comrades
 
Banner please!

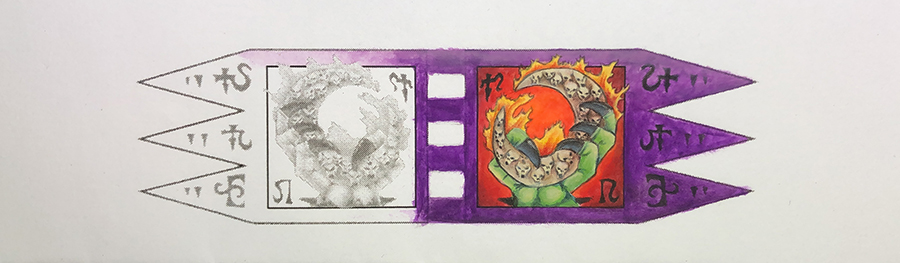
Now there was only one thing left to fnish this dude. The Banner of the Cold One Knights Standard Bearer. The Banner wich was designed from Neil Hodgson for the studio army is one of the most beautiful ones and is beside his Army Standard my favorite Banner design. The banner design was published in White Dwarf #190. There was need to transfer it to a line template. I used a scan and photoshop to create my template. I adjusted the contrast to very light and printed it. The template was sprayed with three layers of matt vanish to seal the surface. Then I started painting my beloved banner design. Time and motivation was on my side and I fnished the banner in only three sessions in a couple of days in the beginning of August. 


Prepared print of the banner design ready to paint

First half done

Second half done

The finished Banner after adding some more details and corrections

However, two more weeks had gone by until I was able to fix it to the standard and give it its finish.


Freehand madness

Finishing the Standard Bearer was a great motivation. Especially, because the banner turned out that good was a big surprise as I had a lot of respect of its design. I thought it would be good to use the flow and continued with more freehand work. Time to paint one other point on my to do list of things I prefered to skive off... SHIELDS! They should carry also a skull design fitting to their pennant. I had already done one of these designs but I was a bit unhappy because the skull was slightly to large for my taste. This time I wanted to try a bit smaller design. The shields for three were already prepared and painted on their back side. This time I decided to paint them without mask and use freehand skills only.

I also decided to paint them ALL at ONCE to get a highly reproducible result. Therefore, the armory was very busy in the end of august with some Dark Elves shield mass production. The most important thing were the line sizes and arrangements in the beginning to get a reproducible result. Here I really used a ruler to check the correct size and location. Later lines and proportions were estimated. It is important to have a strategy what is drawn in which sequence to get the correct size and proportions. Later stages include corrections using foreground and background and vice Versa to shape the final design. Fine lining techniques were used to define the outlines and details. Blending techniques were used to create attractive areas with depth and details. I put the individual stages on different shields to demonstrate the process. I hope this helps you to get an idea what I had done there. 

Step by step process of the freehand development

One more finished and step by step development of the following

Three skulls finished, rough details on the forth and proportions on the fifth

All freehands finished and the golden edge was added

Finished shields with battle damage


My nemesis

Time to finish my nemesis. Time to finish the two remaining Knights. I started with the "low hanging fruits" and therefore with the Knight who misses only the finish on his pennant and base. The golden outline was added and the light situation on the pennant was adapted in depandance of the drapery. He also get one of my finished shields. At this point point it only takes one painting sessions to finish this guy. Insane that since half a year I was a couple of evenings away from finishing this Knight. But sometimes I have this blockade which need some distance to get through it. I moved on to the last Knight. I painted his pennant which was already prepared and ready for painting since a long time. It took me two small sessions to paint it and fixed it to his lance. Then I gave it its finish and added some more details to the base of the Cold One Knight. Finally, the Knight get also on of the finished shields and he completed my unit of six Cold One Knights.


These pictures just give an overview with the regiment in focus. I have planned to publish some more articles concentrating on single miniatures and groups of miniatures showing these knights more in detail. So far I hope these pictures give you a first impression and I hope you like the result. As always I would be happy to read your thoughts and your feedback in the comments. 

Outlook

People who know the Studios Dark Elves Army know that my unit does not cover it at all. There are some more Cold One Knights and Characters riding Cold Ones and I want them all! I want TEN Knights! That means two more Knights and the Battle Standard Bearer have to be included in this unit. While writing these lines a further Knight is already work in progress. He also will ride a bluish coloured Cold One which is already finished. The Knight is already half way done. The second Knight is ready to get painted. The conversion for the Battle Standard Bearer is finished and I am more than happy with this character. I can´t wait to paint this miniature and I am sure this Dude will become a centerpiece of this regiment and of this army. Here some teaser what will be on the workbench until end of the year.
 
 
 Two teaser pictures will show what will come next and that this regiment is not finished yet

Now I am at the end of this article. It is already clear that finishing this regiment swallowed most on my spare hobby time in 2021. Thanks for joining me on this trip. Thanks a lot for reading and I hope you enjoyed this wall of text and pictures. Stay tuned for the further progress on this mighty regiment.
 
Kind Regards,
GeOrc
    

Monday, December 30, 2019

Dark Elf Warriors - Swordsmen I


Dark Elf Warriors - Swordsmen
Today I want to write about the simple troppers of the Dark Elves Army. But not about the plastic miniatures most of you will think about now. I want to write about the metal version of this regiment. I first came across these miniatures when noticing that one of the two displayed regiments of the Eavy Metal pages in the Armybook contain more than one monoposer. Several years later I read the story of these two miniatures on the Collecting Citadel Miniatures Wiki pages:

"While the metal Dark Elf Swordsmen look like prototypes for the single-pose plastic Swordsman, they were released and sold blistered by themselves in packs of 2. When originally released, single-pose plastic Swordsmen came in a box of 10 (without shields or waterslide transfers), this was later reduced to a box of 8, with added shields and transfers. Shield transfer 2 was apparently the only transfer sheet sold with the plastic swordsmen. The plastic Swordsman model may have originally been intended for use with the Talisman fantasy boardgame (like the single-pose plastic Beastman & Skaven models), but the Dark Elf character was dropped from the game prior to publication (rules for the Talisman Dark Elf character were published later in White Dwarf magazine)."


The History of the Dark Elf Swordsmen
Indeed these Warriors were some kind of prototypes. As their metal tab reveal these two miniatures were sculpted by Aly Morrison in 1993. Therefore, these were some of the first Dark Elfs designed by him while most of the miniature range was designed later in 1995. A few other miniatures also have a tab dated 1993 e.g. some Warriors with Repeating Crossbows, a Witch Elf and two Spearmen. The latter were of special interest here as both are conversions which based on the two Swordsmen. Therefore, Aly used the Swordsmen to design his first Spearmen in 1993. These two Spearmen were converted a second time in 1995.

                                                    Dark Elf Warriors and on their basis converted Spearmen


In contrast, the plastic Warrior was designed in 1994. Consequently, the metal version were produced first. A closer look on the plastic Warrior shows that his design based mainly on Swordman 1 but also shares some design elements from Swordman 2.


                                Dark Elf Warrior - Swordmen plastic version from 1994 in reference to the metal version from 1993


When the Dark Elfs were released in 1995 the metal versions of the Dark Elf Warriors were shown on the Eavy Metal pages painted in a Red/Blue colour scheme. A closer look revealed that the regiment consisted partly of metal and plastic Warriors. Only 5 to 6 metal miniatures can be spotted in the two ranks.

Dark Elves Warrior Regiment painted by the Eavy Metal Team

Additionally, the metal miniatures were listed in the catalogue pages of the first UK Dark Elves Armybooks with product codes DE6 and DE7.

Catalogue page from the Dark Elves Armybook (UK Version)


The cataloge pages seems to disappear in later printings of the UK Armybooks and were replaced by product pictures of an example army. To my knowledge the original catalogue pages were missing in Armybooks released in other languages. With the release of the Dark Elves Army only the plastic miniatures were featured in the White Dwarf and the metal versions were never catalogued in a European catalogue. Quite different in the US, here you can find the metal Swordsmen in the Warhammer catalogues from 1996 and 1997 as well as in the complete catalogues from 1997 and 1998 available under the product code 8510D. The Dark Elf Swordsmen were sold in blisters of two miniatures using this product code but sold less in Europe and the US due to the limited informtion and because of the cheaper plastic miniatures.   

My hunt for building a Swordsmen regiment
Today these metal Warriors were very rare and only appear from time to time on Ebay and the second hand market places. When I started to repaint my 4th Edition Dark Elves army I decieded to close the gaps in my collection. I saw the Dark Elf Swordsmen first in a polish market place, but had no chance to get these miniatures. However, after some time I found an Ebay auction from the US selling six of these guys. Two more Ebay auctions with 2 and 9 Swordsmen, both from Canada filled my ranks with 17 troopers. Finally, I added a command crew and my unit was completed with 20 Dark Elf Warriors in total.

Dark Elf Warrior - Swordmen regiment

I needed half a year to collect this regiment and in my experience, getting these miniatures only on the other side of the atlantic ocean confirmed that these Warriors were sold in Europe only in low numbers.


Painting the Swordsmen - A story of Try and Error
Painting the first Swordsmen was not easy. I wanted to continue with my purple/red colour scheme but had no idea how to distribute the colours on the miniature. With this question I started a journey on the long road of try and error. I know that most painters hide their failures and failed projects. Here you get an idea how it looks like when projects fail and how you learn by try and error.     


I wanted to paint the Warriors in red colours but I feared that painting all details in red makes them look like candy. As all my Dark Elfs of this army contain red and purple in different amounts, I had the idea to bring in more purple. Instead of focusing on one colour I balance both and painted them in equal amounts. It shows that, this does not work as purple and red were used here as saturated colours and therefore the eye does not find a focus. The result does not look harmonic and I knew that I had to change something. From the beginning the red colour was my favorite one. A second try followed in which I skipped the purple and replaced it by unsaturated blue in relation to the studio paint job. For the blue I took the same colour as I used for my bluish Cold Ones. The result looks better but also pale and finally not convincing. I wanted that these Dark Elf Warriors look more aggresively. I assumed that I had to paint the blue parts in red as well. But, this required to repaint the clothes for a third time adding a lot of paint to these parts. One guiding principle of my way of painting is that:

The miniature should look coloured, NOT painted!

This principle required a fine paint job with as less paint layers as possible. Now that I had already parts on this miniature which were repainted for one time makes it necessary to strip the paint of the miniature. Otherwise these parts would look smoother and with thicker colour as parts painted for one time only. Therefore, both miniatures went into the glass with acetone. I needed a new test miniature. I decided to paint the Champion, as he has less clothes which will allow to check how a miniature with red on most details will look like.

Painting the Dark Elf Warriors - Swordmen Champion
I used my already painted purple Dark Elf Champion as reference and swapped the purple to red tones and vice versa. I made one exception, the border of his chain mail which I painted also in red. The rest of the miniature is nearly identical with the other Champion. I added a nice freehand on his cloak for which I used a Dark Elf symbol of a star from the Dark Elves Armybook as reference. Finally, my redish colour scheme looked very good on this one and I get a lot of very positive feedback for this Champion. The result motivated me to transfer the colour scheme on the Warriors.


Painting the Warriors
I started by painting on many areas of both miniatures at the same time to get an idea if the coulour scheme works. My first impression was, that adding more red does not disturb the overall look. Then, I started to add more and more details, lights and shades. With that, I realized two problems on these miniatures. First, the swords get to much gold and second the Warrior with the feather on his helmet misses details to add some purple.


To avoid to much gold on the sword required to paint the triangle on the blade in a different colour. I saw two options, paint it also in red or in metal. Because I wanted to avoid to add more red, I choose the latter and repainted these areas in NMM silver. Consequently, the swords looked much more like the sword form the Champion what I liked very much.


The feather was the next difficult area to find a solution. I started to paint it also with a red ending and then decided to make a transition from black through purple to red. The result was really stunning and is one of the parts of these miniatures I like the most. I was really satisfied with the overall look of these two guys. But there was one thing left... the shields!


Finished Dark Elves Warriors - Swordsmen without shields

For the shields I wanted to show some kind of heraldy. As these Warriors will by the related to the General on Cold One I wanted them to carry a related symbol from him. Therefore, I wanted to add the dragon wings, but instead of a winged skull I wanted to add the winged gem. I had the option to give them black or red shields. Finally, I decieded to try the red ones, as this was much closer to the original one on the General. I started by painting the whole surface in red. The I painted the symbols completly free on the shields. Here I started with the golden gem socket which I put into the middle. Then I added the single fingers of the wings and finally the tail. Then I made the lines marking the skinny part of the wings. Here you can see the finished first sketch.


Freehand works on the shields - Initial sketch

To this sketch I added more and more details, light and shadows to seperate the symbol more and more from the background. Finally, I added a gold edge around the shield and add some scratches. Here I avoided to destroy to much of the symbol and placed them more in the periphery. In a last step I painted the backsides. I did not used glue to put the finished shields on the miniatures. Instead I used Patafix (some kind of Blu Tack). Here you can see the final result.


These two guys were a real challenge. They are wonderful miniatures full of details which makes it really hard to find a colour scheme allowing to show as much detail as possible. Even if it was a hard and long way I enjoyed painting these two miniatures. I like how the red work on the Champion and his two troopers and they share a really Roman look. What´s next?! Two finished means that there are only 15 left to complete the whole regiment. Additionally, I have to paint the standard bearer and the musician. But as the colour scheme is set now, it is only a matter of time to complete a first unit of 10 Warriors which will be extended step by step. I hope you like this guys and as well my research and this article. Let me know what you think and share your thoughts in the comment.

Kind Regards,
GeOrc